
In my pursuit to learn AI, I found a lot of advice on the internet. Some good, some mediocre, and some that wasn’t even applicable to me. However, one thing that was missing from all the guidance was how to create an environment on my home PC to experiment.
You see, it wasn’t very far into my AI learning journey when I discovered that most of the cool open-source models, tools, and GitHub projects were predominantly created for Linux. But what if you are working from a Windows machine?
To back up a bit, the main problem I found was getting Windows and Linux to share the same video card. As I mentioned in my last post, for LLM models running locally, the hardware acceleration of a video card makes the chat conversations go much faster. The speed of the VRAM and parallelism of the GPU makes all the difference in the world.
This is where Windows Subsystem for Linux (WSL) comes into play. Regardless of its quirks and doing things a little differently than a full-blown OS install, WSL allows you to run a full Linux environment without leaving the comfort of Windows. This opens doors to more powerful command-line tools, libraries, and frameworks essential for AI experimentation and deployment.
Some would ask, why not use something like VMware Workstation Pro to virtualize Ubuntu? A good example of why is when I tried to get TensorFlow running. Since TensorFlow’s native Windows support was discontinued in version 2.10, it now requires the full NVIDIA driver package to be installed in Linux. Now, as much as I love VMware Workstation, as hard as I tried, I couldn’t get the VMware video drivers (handling the GPU pass-through) to work with it at all.
Long story short, last weekend I decided to replace my Ubuntu 22.04 WSL instance with a fresh Ubuntu 24.04 installation, so I documented all the steps to bring you along with me as I get everything re-set up.
Let’s get started!
Installing Windows Terminal
The first thing I recommend before installing WSL is to get Windows Terminal installed. If you haven’t ever used Windows Terminal, it is basically a tabbed command prompt window. It allows you to open multiple different command prompts like CMD, PowerShell, and your WSL instance in the same window.
Installing Windows Subsystem for Linux (WSL2)
Next you need to install WSL itself. Since I already have it installed on my machine, I will refer you to the official Microsoft installation instructions.
Once WSL is installed, the first thing I did was set the default version to 2. As you can see in this WSL1/WSL2 comparison, I need the “Full Linux Kernel” and “Full system call compatibility” features in order to get things like Docker working.
C:\Users\dschmitz>wsl --set-default-version 2
For information on key differences with WSL 2 please visit https://aka.ms/wsl2
The operation completed successfully.
Next, let’s see the latest distros that are available.
C:\Users\dschmitz>wsl --list --online
The following is a list of valid distributions that can be installed.

Install using 'wsl.exe --install <Distro>'.
NAME                            FRIENDLY NAME
Ubuntu                          Ubuntu
Debian                          Debian GNU/Linux
kali-linux                      Kali Linux Rolling
Ubuntu-18.04                    Ubuntu 18.04 LTS
Ubuntu-20.04                    Ubuntu 20.04 LTS
Ubuntu-22.04                    Ubuntu 22.04 LTS
Ubuntu-24.04                    Ubuntu 24.04 LTS
OracleLinux_7_9                 Oracle Linux 7.9
OracleLinux_8_7                 Oracle Linux 8.7
OracleLinux_9_1                 Oracle Linux 9.1
openSUSE-Leap-15.6              openSUSE Leap 15.6
SUSE-Linux-Enterprise-15-SP5    SUSE Linux Enterprise 15 SP5
SUSE-Linux-Enterprise-15-SP6    SUSE Linux Enterprise 15 SP6
openSUSE-Tumbleweed             openSUSE Tumbleweed
I am starting from scratch installing Ubuntu 24.04, because I want to attempt to get all of my favorite tools working on the latest Ubuntu version. [Prior to now, I archived my Ubuntu 22.04 image into a tgz tile for future reference. However, to be completely transparent, I have not double checked if all the tools I want to get working are compatible with 24.04 yet, but we are going to give it a good college try.]
Here is the command to install the latest Ubuntu distro:
C:\Users\dschmitz>wsl --install Ubuntu-24.04
Installing: Ubuntu 24.04 LTS
Ubuntu 24.04 LTS has been installed.
Launching Ubuntu 24.04 LTS...
Installing, this may take a few minutes...
Please create a default UNIX user account. The username does not need to match your Windows username.
For more information visit: https://aka.ms/wslusers
Enter new UNIX username: dschmitz
New password:
Retype new password:
passwd: password updated successfully
Installation successful!
To run a command as administrator (user "root"), use "sudo <command>".
See "man sudo_root" for details.

Welcome to Ubuntu 24.04 LTS (GNU/Linux 5.15.153.1-microsoft-standard-WSL2 x86_64)

 * Documentation:  https://help.ubuntu.com
 * Management:     https://landscape.canonical.com
 * Support:        https://ubuntu.com/pro

 System information as of Sat Aug 31 11:01:37 CDT 2024

  System load:  0.31                Processes:             38
  Usage of /:   0.1% of 1006.85GB   Users logged in:       0
  Memory usage: 3%                  IPv4 address for eth0: 172.24.88.98
  Swap usage:   0%

This message is shown once a day. To disable it please create the
/home/dschmitz/.hushlogin file.
dschmitz@SLY:~$
With a fresh install of Ubuntu running, it is a good idea to follow best practices and update the machine.
dschmitz@SLY:~$ sudo apt update && sudo apt upgrade -y
[sudo] password for dschmitz:
Hit:1 http://archive.ubuntu.com/ubuntu noble InRelease
Get:2 http://archive.ubuntu.com/ubuntu noble-updates InRelease [126 kB]
Hit:3 http://security.ubuntu.com/ubuntu noble-security InRelease
Hit:4 http://archive.ubuntu.com/ubuntu noble-backports InRelease
Fetched 126 kB in 1s (112 kB/s)
Reading package lists... Done
Building dependency tree... Done
Reading state information... Done
...
Processing triggers for man-db (2.12.0-4build2) ...
Processing triggers for debianutils (5.17build1) ...
Processing triggers for libc-bin (2.39-0ubuntu8.3) ...
Configuring my preferred settings
With Ubuntu 24.04 installed and updated, I now want to configure it to run systemd. As mentioned a moment ago, this is another prerequisite for getting things like Docker running in my WSL environment.
dschmitz@SLY:~$ sudo nano /etc/wsl.conf
[sudo] password for dschmitz:
Example of the /etc/wsl.conf file:
[boot]
systemd=true
Normally, all that would be required now is to reboot the machine, but remember WSL is different from a traditional install. It needs to be shut down from the Windows CMD line instead.
C:\Users\dschmitz>wsl –-shutdownAnd while the machine is shut down, I am going to take the opportunity to do some maintenance like set the disk to sparse mode. This allows it to reclaim unused disk space from within the virtual machine’s VHDX file.
C:\Users\dschmitz>wsl --manage Ubuntu-24.04 --set-sparse true
Conversion in progress, this may take a few minutes.
The operation completed successfully.
Moving WSL to a different drive or folder
In addition, by default, the VMs VHDX file is stored in “C:\Users\UserName\AppData\Local\Packages\”. Given that my last image ballooned to 153 GB with all my venv and conda environments, you can move it to another larger drive or anywhere else that you like. In summary, the following steps are basically used to export, unregister, and reregister the instance to a new folder or drive location.
C:\Users\dschmitz>wsl --export Ubuntu-24.04 d:\mycode\ubuntu-24.04-wsl.tar
Export in progress, this may take a few minutes.
The operation completed successfully.

C:\Users\dschmitz>wsl --unregister Ubuntu-24.04
Unregistering.
The operation completed successfully.

C:\Users\dschmitz>mkdir c:\wsl

C:\Users\dschmitz>wsl --import Ubuntu-24.04 c:\wsl\ubuntu-24.04 d:\mycode\ubuntu-24.04-wsl.tar
Import in progress, this may take a few minutes.
The operation completed successfully.

C:\Users\dschmitz>wsl --set-default Ubuntu-24.04
The operation completed successfully.

C:\Users\dschmitz>
You can check to see if Ubuntu is running with this command.
C:\Users\dschmitz>wsl -l -v
NAME            STATE           VERSION
* Ubuntu-24.04    Running         2
Configuring the WSL keep-alive
One of the resource saving “features” of WSL, is that if it is not used, Windows shuts down the instance after an annoyingly short idle period. In practical terms, what this means is that if I want to host an LLM on my local machine and keep it running to answer questions on a whim, that I had to restart everything each time I wanted to use it.
Fortunately, there are multiple ways to keep the Ubuntu OS running, but how to solve it depends on what version of Windows you are using. If you are using Windows 11, you can just add the timeout parameter to the wslconfig file.
C:\Users\dschmitz>type %USERPROFILE%\.wslconfig
[wsl2]
vmIdleTimeout=-1
However, this option does not work with Windows 10. So, for W10 users, the easiest solution I have found is to use a CMD file that runs a special WSL command on Windows startup.
This can be done by creating a CMD file named wsl-keepalive.cmd with the following line in it:
Example of the wsl-keepalive.cmd file:
wsl --exec dbus-launch trueThen place this CMD file in your startup folder, so it runs each time Windows boots. [WindowsKey + r, shell:startup, <Enter>]

Recreating Windows Terminal’s Ubuntu Profile
One of the side effects of moving my WSL instance to the new folder, is that I needed to create a new Windows Terminal profile for it. Here are the settings I used:
- Name: Ubuntu 24.04 LTS
- Command Line: wsl -d Ubuntu-24.04 -u dschmitz
- Starting directory: ~
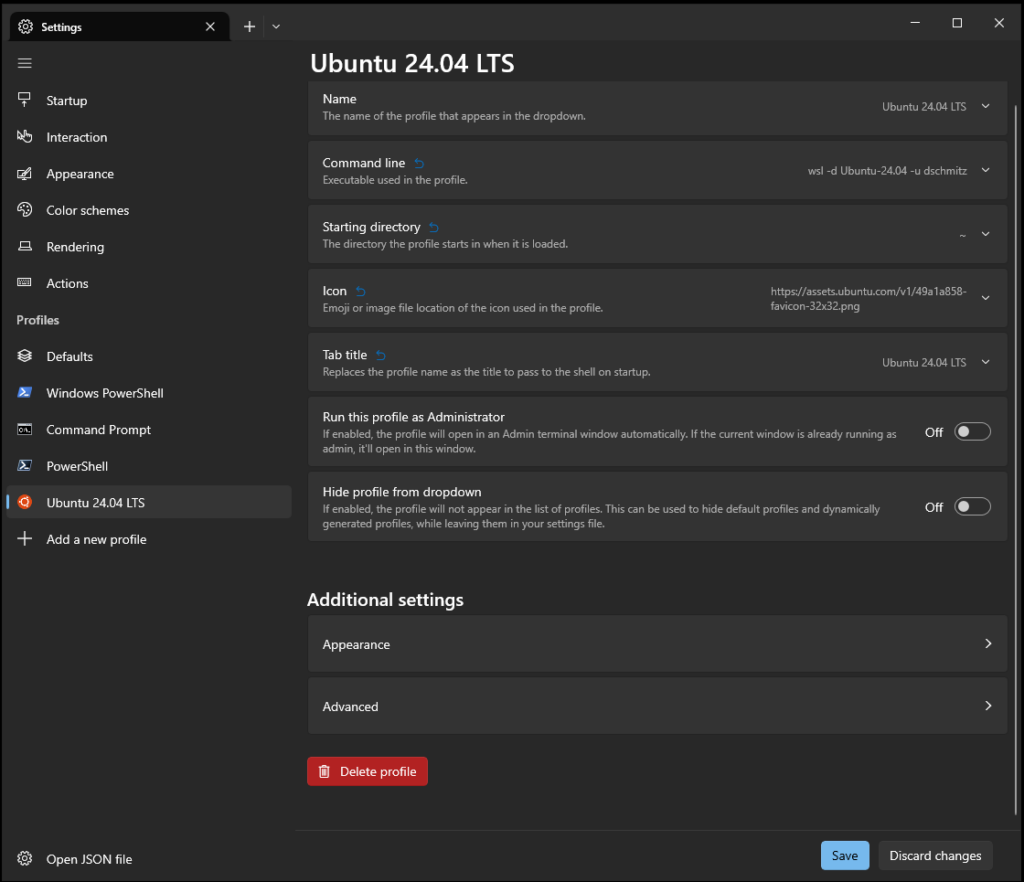
Finally, open a new Windows Terminal Ubuntu prompt, then you can check that systemd is running by issuing the following command:
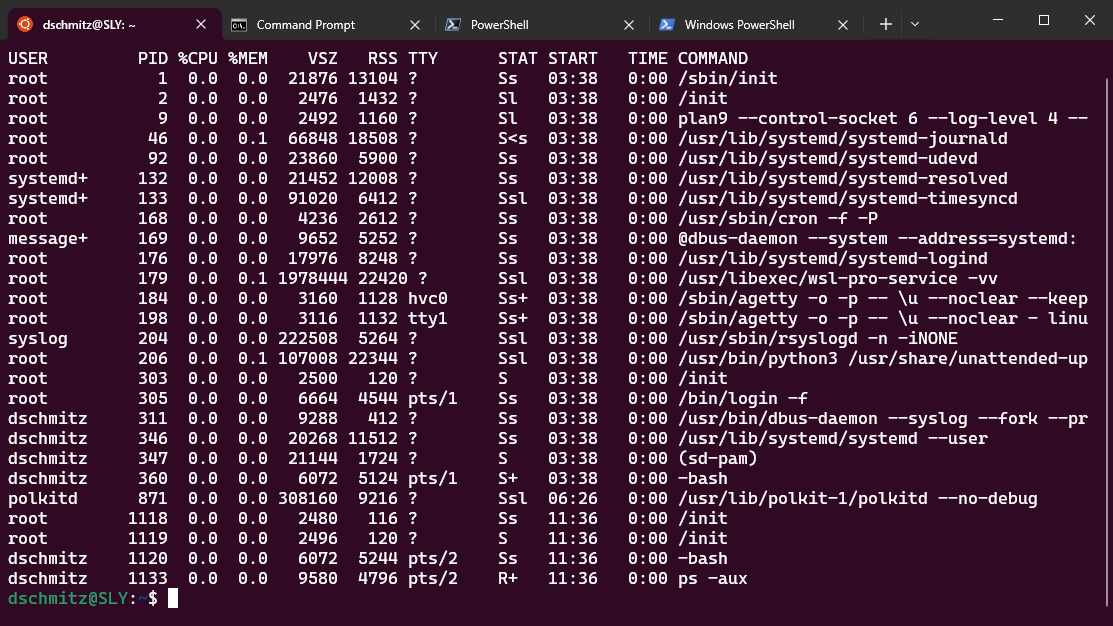
dschmitz@SLY:~$ systemctl list-unit-files --type=service
UNIT FILE                                    STATE           PRESET
apparmor.service                             enabled         enabled
apport-autoreport.service                    static          -
apport-coredump-hook@.service                static          -
apport-forward@.service                      static          -
...
wsl-pro.service                              enabled         enabled
x11-common.service                           masked          enabled

175 unit files listed.

dschmitz@SLY:~$
This listing out all of the services verifies that systemd is running and that we can now move onto future projects.
Conclusion
If you have made it this far, thanks for reading. In my last post, I showed you how to get a Windows-based LLM engine running. So, for my next post of this series, since we now have Linux operational, I will detail how to get my favorite Linux-based LLM engine and GUI running. Please check back later, because I am super excited to share it with you!
Next up: Building your AI playground (Part 2) – Ollama, Docker, and Open WebUI