Recently, I cancelled my ChatGPT Plus subscription. With open source models running locally on my personal computer, I found myself using ChatGPT less, and less, and less. There were still times where I wanted to consult it, but I simply couldn’t justify spending the full $20/mo. on a subscription anymore. Ideally, I wanted to still use the latest and greatest models, but unfortunately, their free offering just didn’t allow for that. That is when I discovered I could use ChatGPT models in a pay-as-you-go manner, spending only pennies. The trick was using the OpenAI API with Open WebUI.
Follow along to see how easy it is to get everything going!
Creating an OpenAI API key
Before you begin, you need to create an OpenAI developer platform account, add a payment method, and buy credits.
In my case, I had added $10 to my account for previous project, so I still have funds in my account. (Backstory: Earlier this year, I completed an awesome tutorial from Santiago Valdarrama using the OpenAI API with LangChain to create a simple Python RAG application. I highly recommend it!)
NOTE: When I originally created my account, I had to add real money to it (instead of just using the free credits) before I could access the API. However, their policy may have changed since then.
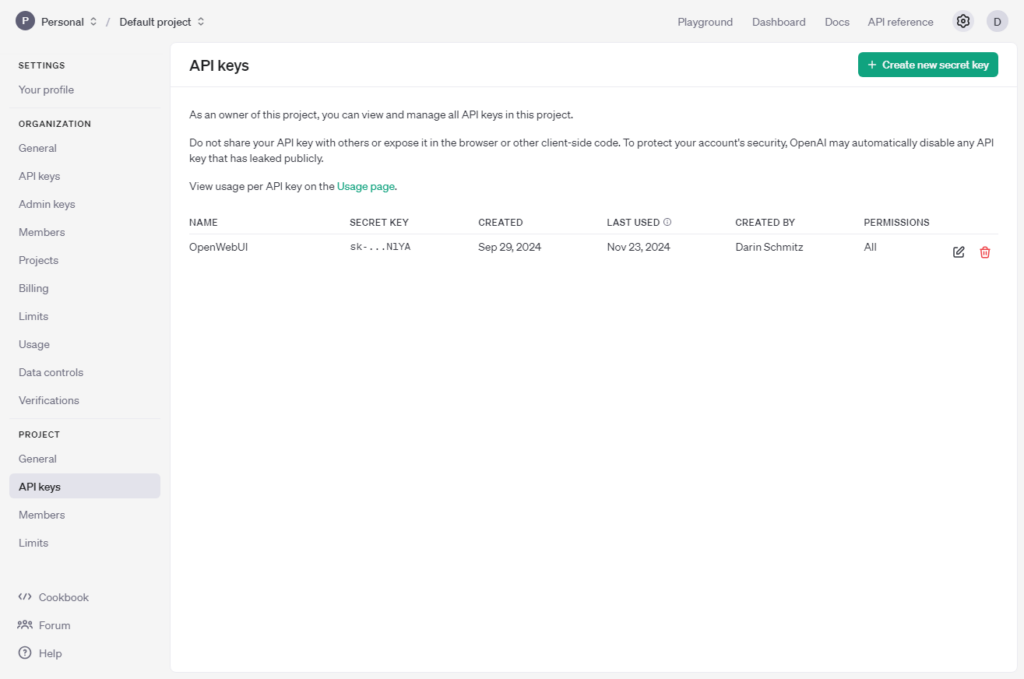
Next, create an OpenAI API key from the API keys menu under PROJECT (see above). I named mine “OpenWebUI” because that is where I will be using it (see below). (Alternatively, you can paste your API key into a different chat front-end like ChatHub if you so desire.)
Tip: When you create a new API key, you only get to see the secret key once, so be sure you copy it correctly or you will end up recreating it.
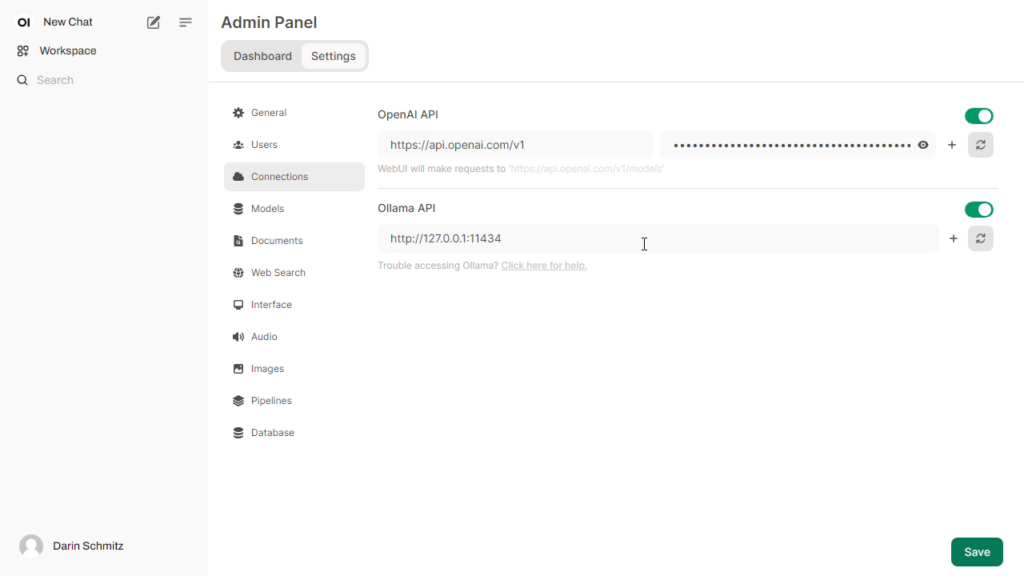
Once you have your API key copied to the clipboard, you can paste it into the Open WebUI admin panel. Click on your name (the menu) > Admin Panel > Settings > Connections
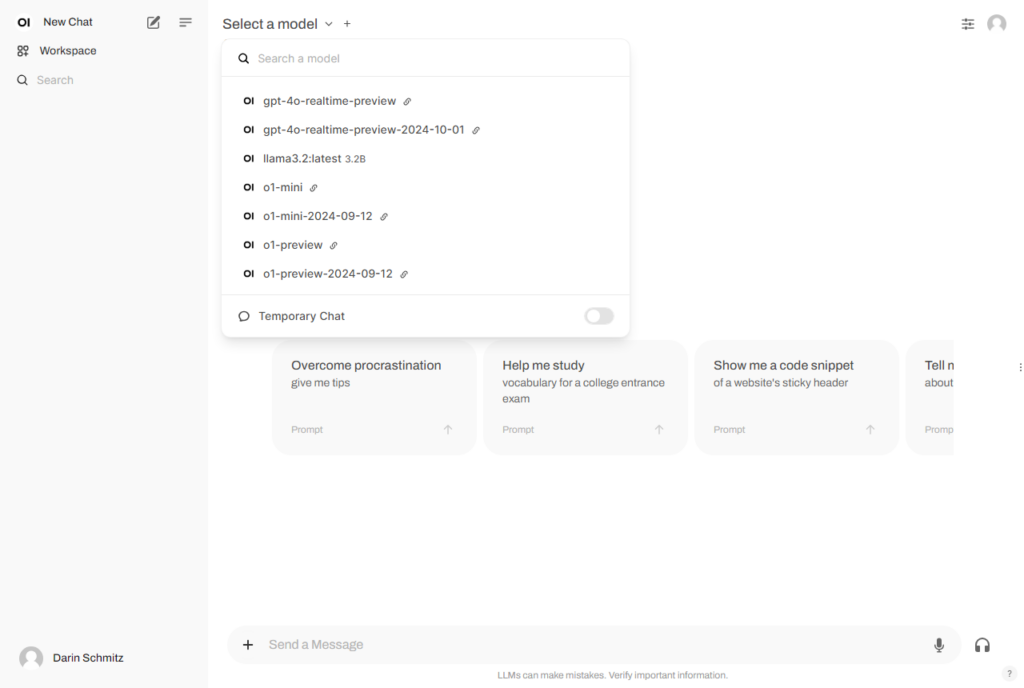
Once the API key has been added successfully, all of the OpenAI models will appear in the model selection dropdown alongside your local Ollama models.
Note: If you don’t have Open WebUI installed, you can follow my tutorial: Building your AI playground (Part 2) – Ollama, Docker, and Open WebUI. Remember that Part1 installing WSL is a prerequisite, unless you want to install Open WebUI on your own.
As you can see above, all of the OpenAI models are available including the latest o1-mini model.
Remember, which model you select determines how much you are going to spend. Be sure to consult the OpenAI pricing page to figure out the costs of each model. At the time of this writing, gpt-4o-mini costs $0.15 / 1M input tokens, and $0.60 /1M output tokens. Whereas o1-mini costs $3.00 / 1M input tokens, and $12.00 / 1M output tokens.
In my case, I used chatgpt-4o-latest which the pricing page lists the costs as $5.00 / 1M input tokens, $15.00 / 1M output tokens. In hindsight, I selected that model because I didn’t realize there was also a cheaper GPT-4o listed. Going forward, I am not sure that what I am doing requires the larger context window. (From what I have read, chatgpt-4o-latest has the 100K context window, whereas GPT-4o has a 30K context window.)
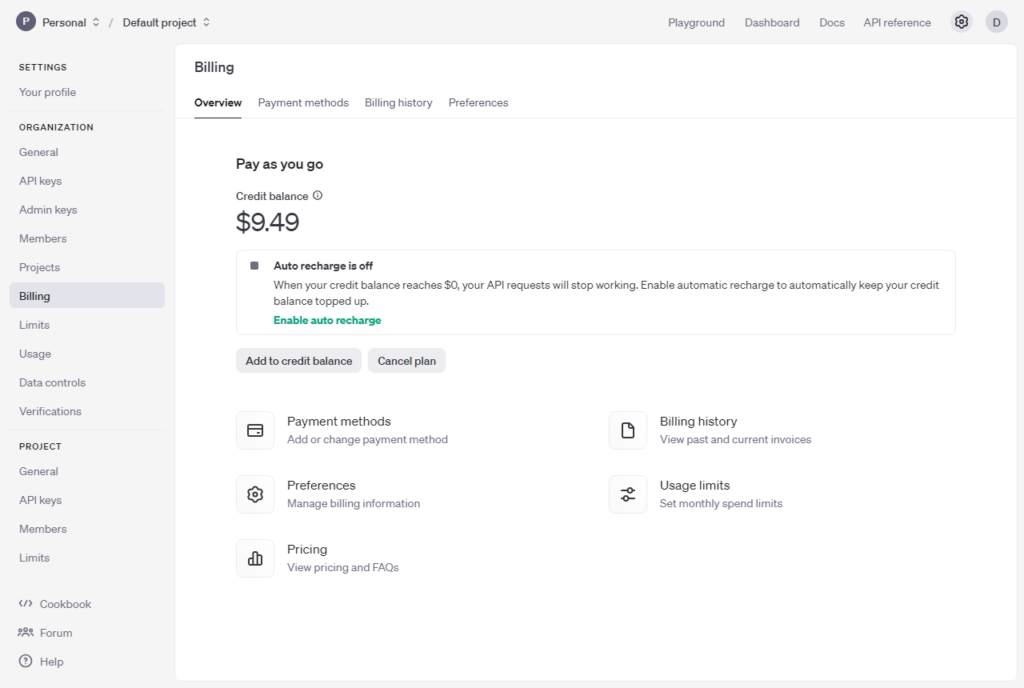
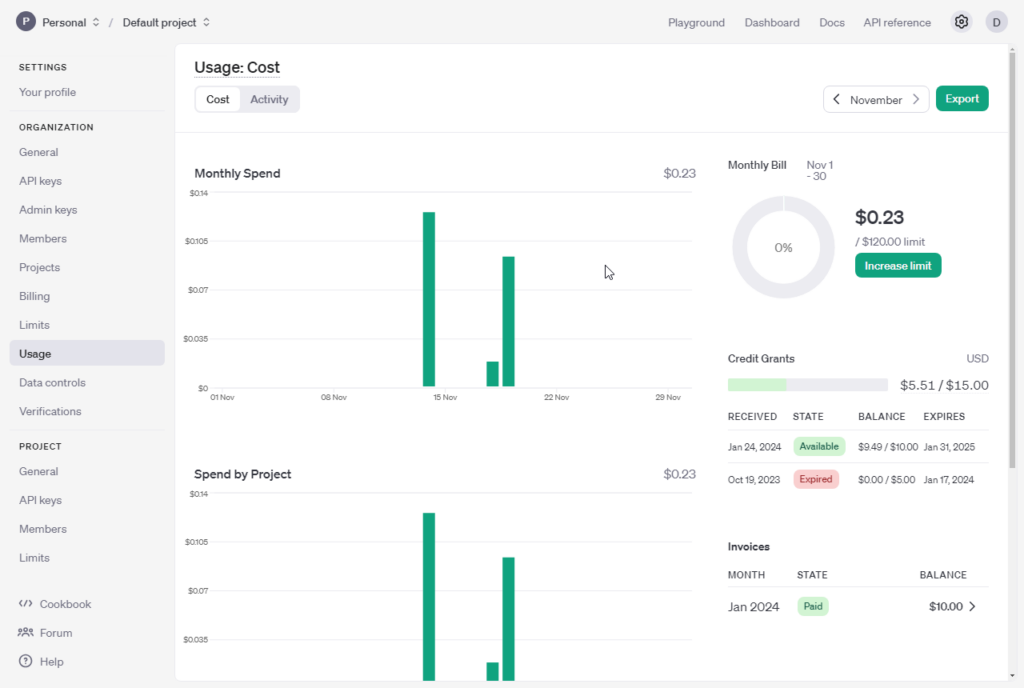
For the month of November, I only spent $0.23 in API credits, which is a lot less than the $20 I would have previously spent on my ChatGPT Plus subscription.
Conclusion
While the full subscription definitely has its benefits (I am still a really big fan of OpenAI’s models), now I feel like I have my cake and can eat it too. For me, spending money on the ChatGPT models on a pay-as-you-go basis, makes much more sense for how infrequently I use them. As you can see from my screenshot above, for the month of November, I saved $19.77. 😀